
Our route notebook / All four endings
Helping Your Boyfriend Endings
We follow the choices, collect the clues and compare all four endings. Start at the first-night pill, then follow our shared investigation or jump to an outcome.
↓ Follow the shared steps↳ Follow the labelled choices↺ Reload the checkpoint on each card
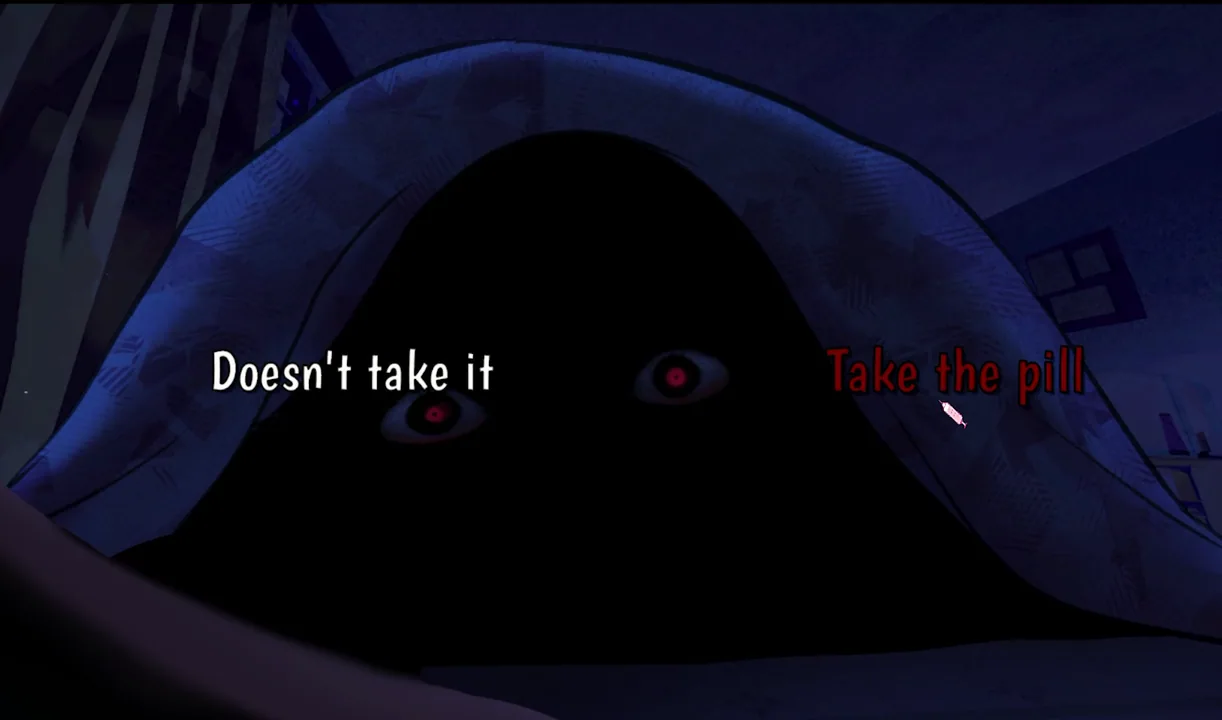
The visitor’s first-night pill
The visitor interrupts our first night and offers a pill. We save before answering: this is the earliest useful fork, and it leaves us room to compare staying with Adrian against investigating the house.
- Take the pill
For the investigation route, we accept it. The next morning brings the number on our arm, and later we can move around when Adrian leaves.
- Doesn’t take it
For the short staying route, we refuse it and continue Adrian’s storyline. We keep that run separate from the rescue attempt; refusing this offer is not a shortcut to Oliver.
Replay from: before the visitor offers the pill
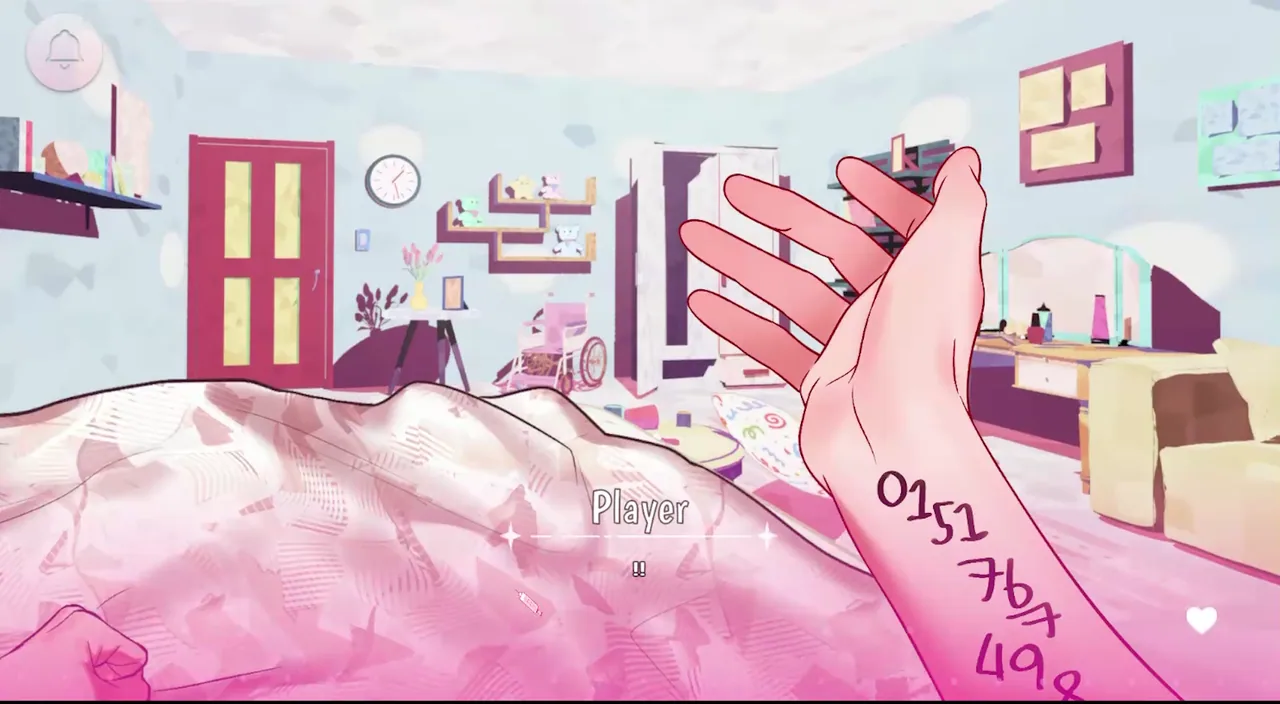
Record the number before it fades
When we wake, the writing on our arm looks like a telephone number. We note all the digits now, before the story smears the ink. Seeing the clue is useful; remembering only the two digits left later is not enough.
- Keep the complete number
The number we use at the telephone is 015767438. We check it digit by digit rather than trusting the shapes of the handwritten groups.
- Continue the Day 2 scenes
The phone is not accessible yet. This is preparation for a later room search, not a call we can make from the bedroom.
Replay from: before the Day 2 morning
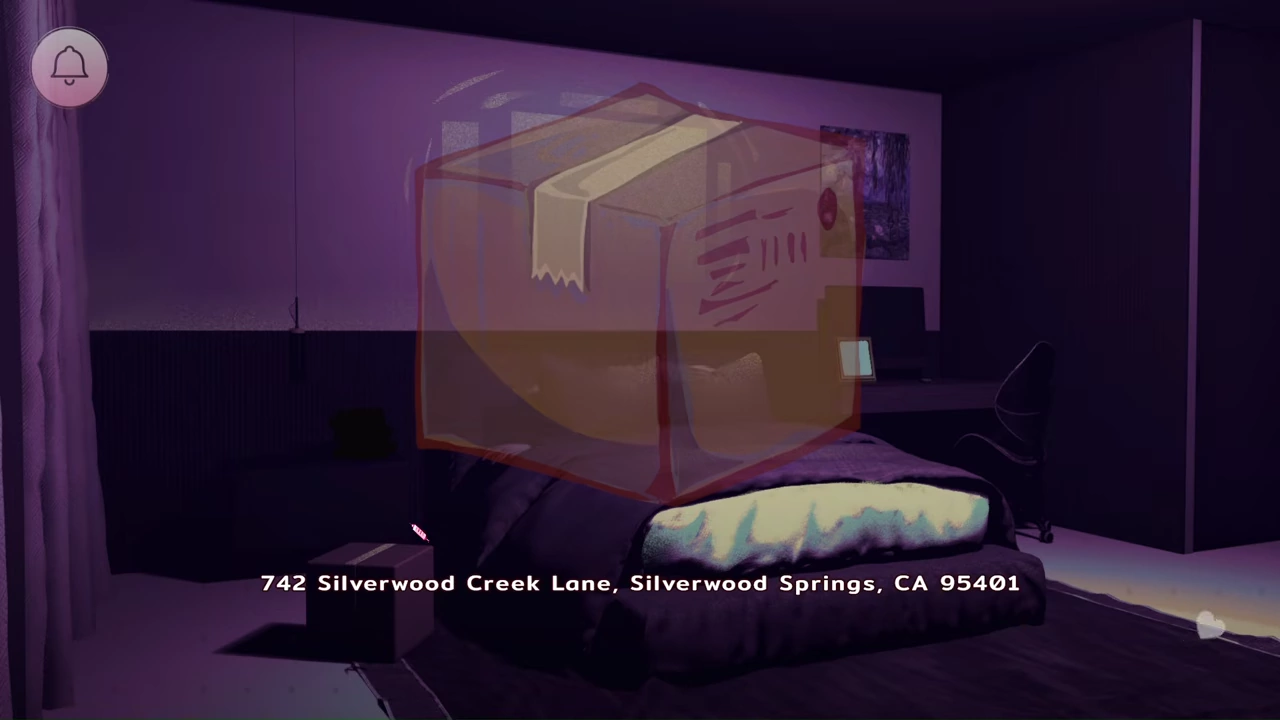
Inspect the package in Adrian’s room
When Adrian leaves and our legs allow us to explore, we inspect the package in his room. We read its label instead of rushing through the rooms: Oliver will need a location, not just a successful phone connection.
- Write down the full address
742 Silverwood Creek Lane, Silverwood Springs, CA 95401. We keep the street, town and ZIP together so that the later near-matching answers do not trip us up.
- Return with both clues recorded
The arm number and this address serve different jobs. One reaches Oliver; the other tells him where to find us. Finding either clue alone does not complete the rescue route.
Replay from: before exploring Adrian’s room
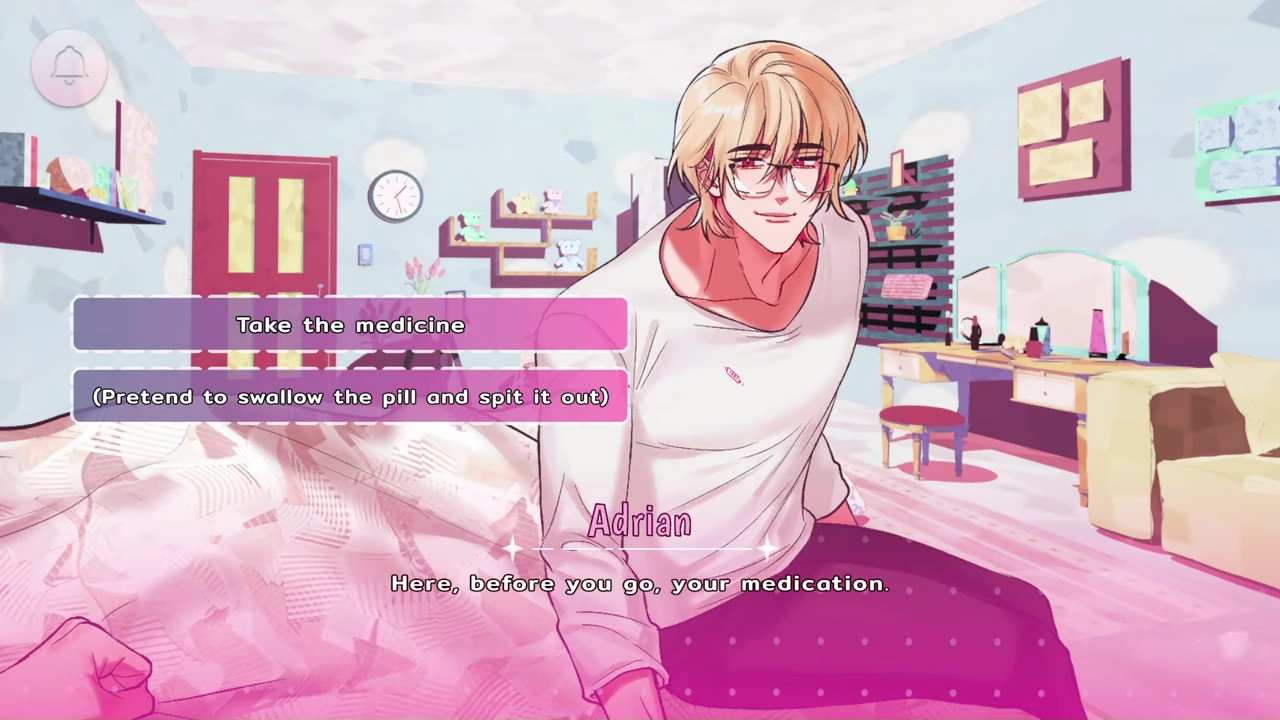
Adrian’s medication: pretend, then spit it out
Adrian’s medicine is a separate decision from the visitor’s first-night pill. We do not treat every pill as interchangeable: accepting Ian’s help does not mean we should swallow Adrian’s medication as well.
- “Pretend to swallow the pill and spit it out”
We choose the pretend option to keep the investigation going. This preserves the next nighttime conversation and the opportunity to act on what we learn.
- “Take the medicine”
This belongs to the staying-with-Adrian route rather than our rescue checklist. If the investigation scenes disappear, we return to this checkpoint before changing unrelated choices.
Replay from: before Adrian’s second-evening medication

How we respond to Ian matters later
Ian’s disclosures are unsettling, but we can answer with warmth or distance. For Moving Forward, we build the supportive direction here and keep it consistent through later conversations. For The Empty Cage, we keep our replies distant while still following the investigation.
- Supportive direction: “I’m your friend”
We reassure him and respond kindly when he talks about himself. These early exchanges matter more than trying to change the relationship after calling Oliver.
- Distant direction
We do not pursue the affectionate responses. Accepting the useful pill or receiving the scalpel is not, on its own, the same as building a supportive relationship.
We also keep Adrian’s relationship direction separate. A warm Adrian run can restrict the later search of his body. For the full rescue routes, we avoid reinforcing his reassuring version of events. We focus on our replies and the available scene, not on a hidden point total.
Replay from: before Ian’s nighttime conversation
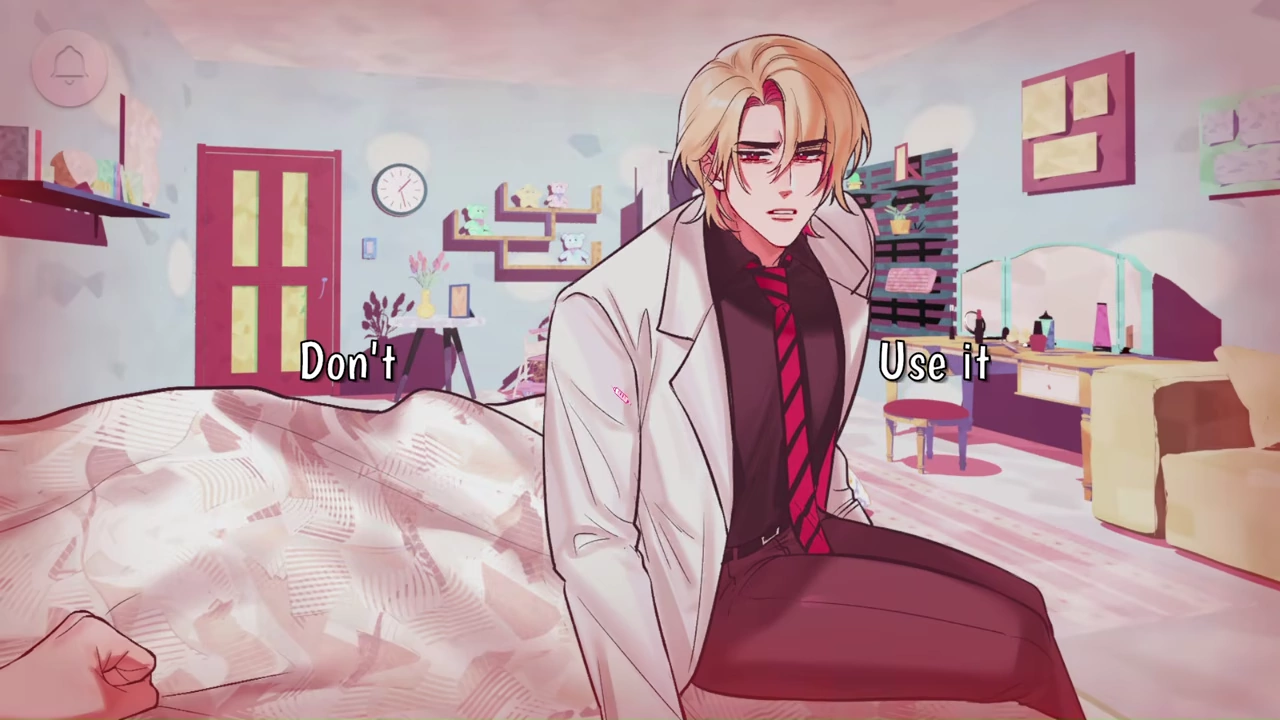
Use Ian’s scalpel—or leave it unused
Ian gives us a miniature scalpel before the next confrontation. We make a new save before Adrian’s Day 3 scene, then decide whether to use it. This is an action fork, not an affection reset.
- “Use it”
We act when the opportunity appears, then complete the confrontation prompts. Choosing to use it starts the dangerous escape path; it does not instantly finish an ending.
- “Don’t”
We leave the weapon unused and continue to My Boyfriend Is the Best. The newspaper outcome is different from being interrupted by a failed timed task.
Replay from: before the scalpel decision

Ending 1: My Boyfriend Is the Best
We stay with Adrian while his public reputation remains intact. The final newspaper praises his work and describes him as a bachelor, a sharp contrast with the relationship we thought we were living. The title sounds reassuring; the closing report makes it uncomfortable.
- Staying route
Refuse the first-night visitor’s pill and continue Adrian’s storyline. Keep the staying attempt separate from the clue-and-rescue run.
- Alternative from the late save
If we already accepted the first pill and received Ian’s scalpel, leave the scalpel unused when the Day 3 choice appears.
- Confirm the result
Finish the remaining scenes and look for the Ending 01 title card. A minigame failure before it is not this ending.
Unlike Nobody’s Home, the house’s secret has not turned into a disappearance report. For our next replay, we change the pill or scalpel fork instead of repeating the same choices faster.
Replay from: before the first-night pill or the scalpel choice
Route complete. Keep this save separate from our working slots.
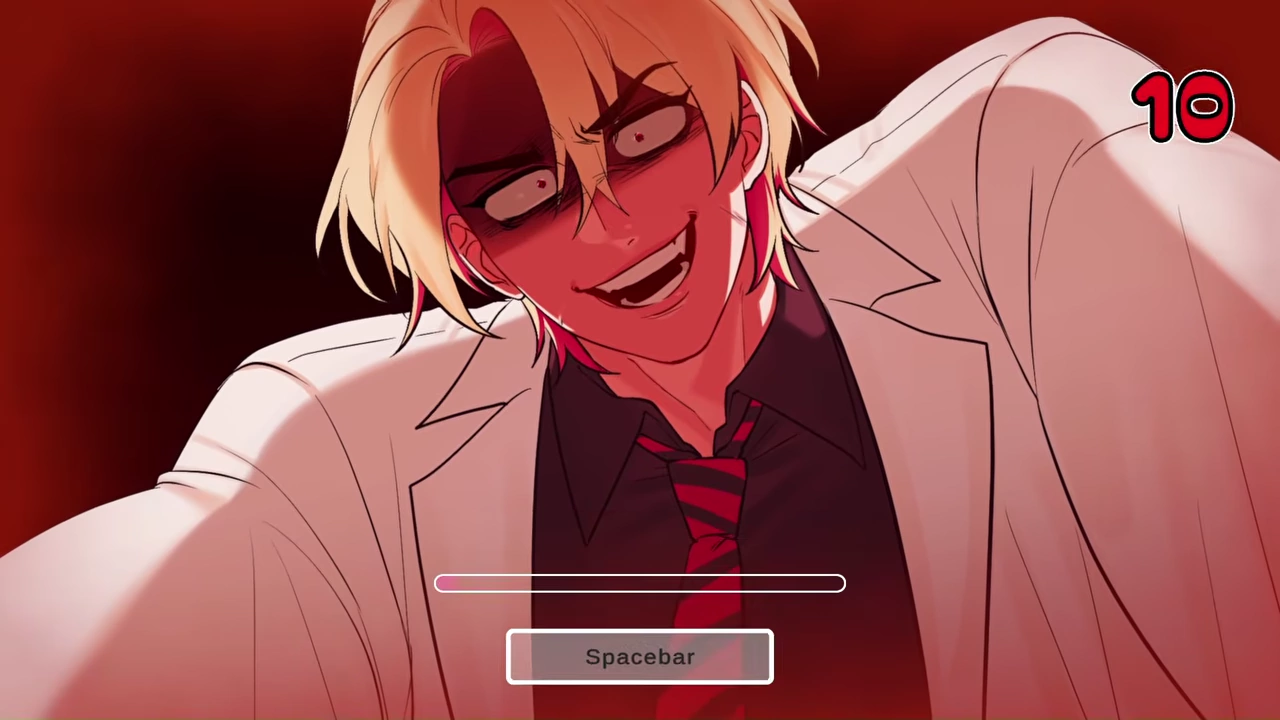
Finish the confrontation before investigating
Once we use the scalpel, dialogue alone cannot carry us to the next room. We watch the input prompt and finish the struggle rather than letting Auto or Skip hide what the game is asking us to do.
- Match the visible input
We use the key shown by the game. The later struggle also uses a timed input, so we keep a working save before each mechanical section.
- Retry without rewriting the route
If we fail, we reload the task checkpoint. There is no reason to change Ian’s early replies merely because one timed prompt went wrong.
In builds that offer a gameplay difficulty setting, we can reduce the timing pressure. Surviving the confrontation only opens the next investigation opportunity; it does not mean the rescue is complete.
Replay from: before the confrontation input

Search Adrian’s body for the key
We pause during Investigation Time and inspect Adrian’s body. The key is the missing link between surviving the confrontation and opening the locked room. Running straight outside skips that opportunity.
- If the search is available
We inspect the body and collect the key, then use it on the previously inaccessible room. We wait for the pickup feedback before leaving the scene.
- If we cannot search
We return to our earlier relationship save and take a less trusting direction with Adrian. Reloading the same late save does not undo the replies that led us here.
A successful struggle is not proof that the body-search option will appear in every relationship state. For the rescue routes, we prepare that earlier direction as well as recording both clues.
Replay from: before Investigation Time; earlier if the search is absent

Open the locked room before leaving
With the key collected, we go to the locked room instead of following the exit outside. We finish the intervening confrontation and enter the room; the phone on its desk is why this detour matters.
- Key first, room second
We cannot replace the key search with random room clicks. If the door will not open, we check the pickup and the earlier body-search state.
- Stay until we reach the desk phone
We keep a checkpoint around the door sequence. After entering, we inspect the telephone rather than assuming that unlocking the door has already summoned help.
Replay from: after collecting the key, before the door sequence
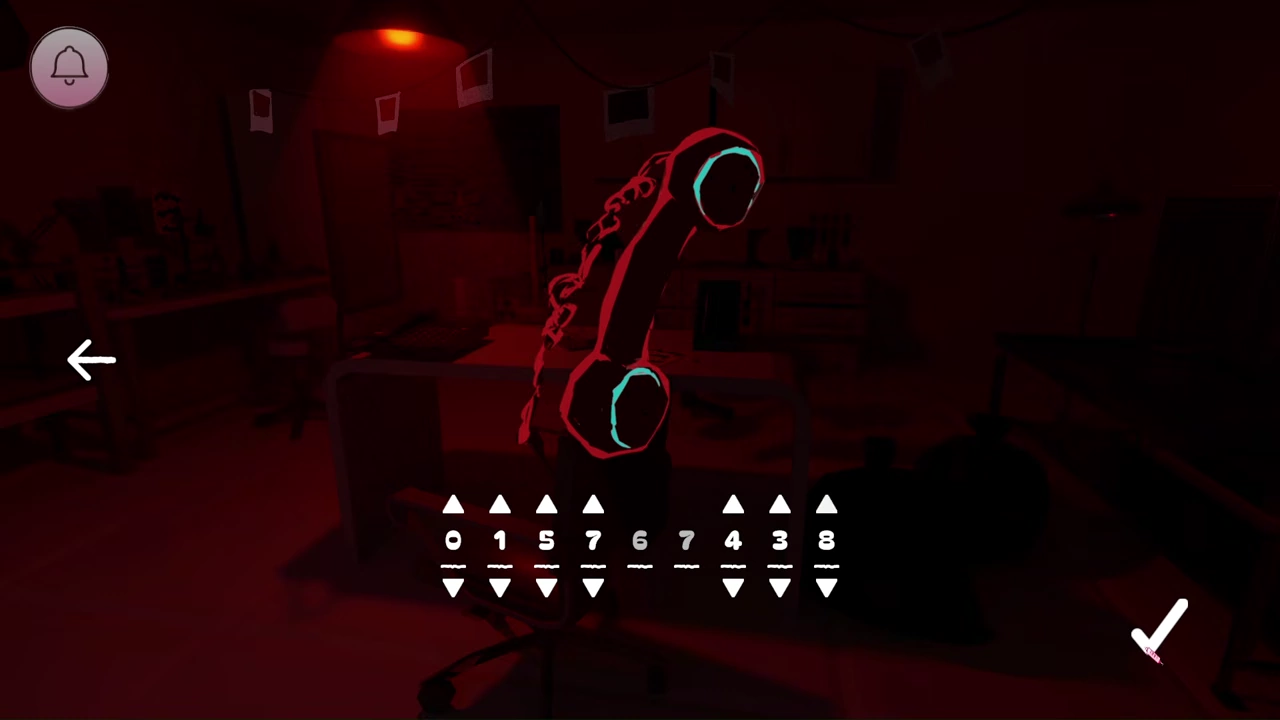
Dial Oliver’s number
The telephone lets us set the missing digits with arrows. We enter 015767438 and confirm the number. We move one digit at a time: the similar-looking handwritten marks are easy to misread when we are rushing.
- Reach Oliver
We wait for Oliver Freeman to answer. A correct number opens the conversation, but the rescue still needs our next answer.
- Do not leave midway
For a rescue attempt, we stay through the address exchange. Leaving without completing the useful call follows the unresolved escape direction instead.
Replay from: before setting the telephone digits

Ending 2: Nobody’s Home
We reach the outside path without completing Oliver’s rescue. The closing newspaper reports Adrian’s disappearance: his colleagues cannot reach him, and the house is empty when they visit. That empty-house report is the defining outcome, not the hospital recovery seen in the next two routes.
- Open the escape path
Accept the first-night pill, pretend to swallow Adrian’s later medicine, use the scalpel and survive the confrontation.
- Leave without the completed rescue
A run that does not follow the key, room and correct-location call through to rescue can finish here. The warmer Adrian route also differs from the body-search route used for Endings 3 and 4.
- Confirm the report and title
Continue to the newspaper and Ending 02 card. Reaching a door or surviving a struggle is not an ending confirmation by itself.
For our next replay, we prepare a less trusting Adrian run, collect the key and complete the call before leaving. If the body search is unavailable, we need an earlier save—not just the one at the telephone.
Replay from: before the investigation exit; earlier if the key is unavailable
Route complete. Keep this save separate from our working slots.
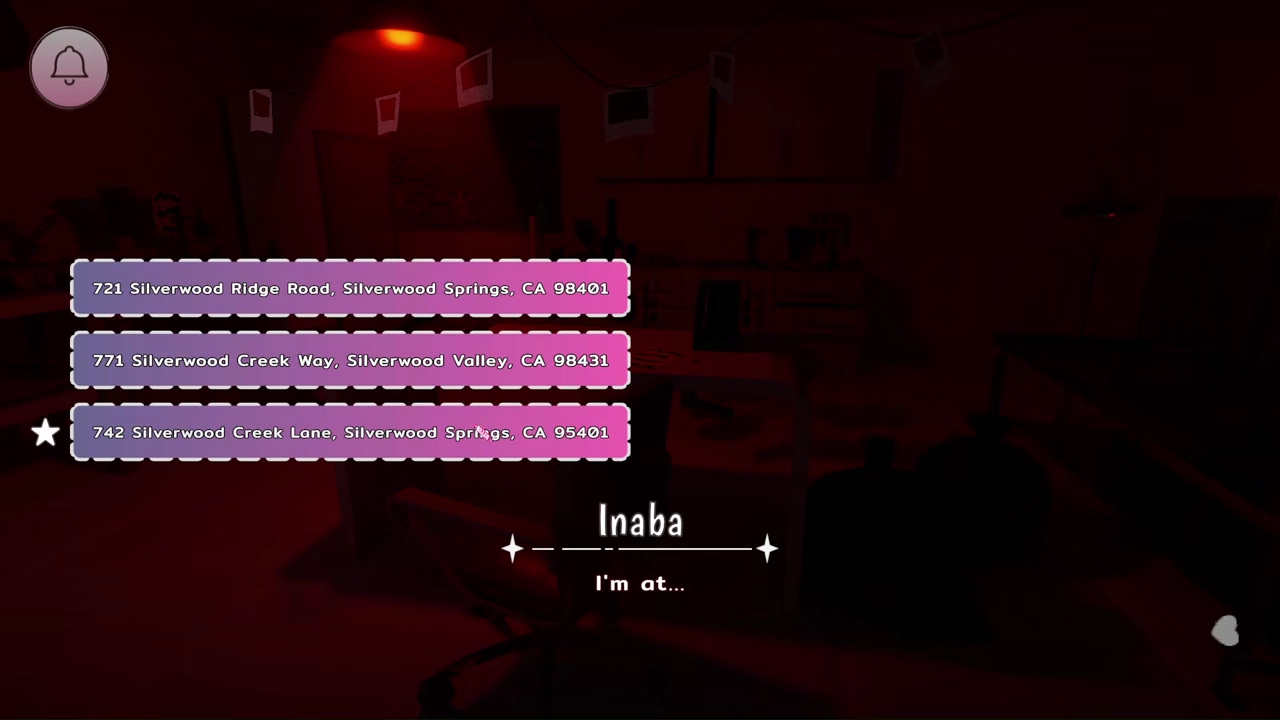
Give Oliver the package address
When Oliver asks where we are, we choose the answer that matches the package: 742 Silverwood Creek Lane, Silverwood Springs, CA 95401. In the English scene shown above it is the third option; matching the text is safer than remembering its position.
- Check the whole line
The alternatives change the street, town or ZIP. We compare the complete label rather than clicking the first answer that contains Silverwood.
- Wait for his response
We let Oliver acknowledge the location and continue the scene. We have now supplied both pieces the call needs: whom to contact and where to come.
Replay from: before answering Oliver; before Day 2 exploration if the clue is missing

The rescue is shared; Ian’s future is not
After the completed call, we continue the outside sequence and its remaining prompts. Both rescue endings lead to a hospital recovery with Oliver. What changes is Ian’s place in the epilogue.
- Earlier distant replies
The investigation still matters, but we have not built the supportive connection with Ian. Follow this accumulated direction to The Empty Cage.
- Earlier supportive replies
We have reassured Ian through the earlier conversations. Follow that accumulated direction to Moving Forward.
These are descriptions of the state we brought into the ending—not two new choices that appear after the phone call. A late reload cannot turn one relationship history into the other.
Replay from: before Ian’s early replies to change the relationship direction
Ending 3: The Empty Cage
We recover in hospital with Oliver’s support, but the aftermath remains unsettled. Adrian and Ian are missing, and a figure outside the window keeps the sense of danger alive. Escaping the house has not neatly resolved everything that happened there.
- Finish the shared investigation above
We follow the main trunk through to Oliver’s acknowledgement, keeping our earlier less trusting direction with Adrian.
- Do not substitute an exit for the rescue
The hospital outcome depends on completing the call before leaving. Surviving a struggle or unlocking a door alone is not enough.
- Keep Ian’s direction distant
We carry the less supportive relationship history into the epilogue, then continue until the Ending 03 title confirms the result.
The difference from Moving Forward is not another number or another address. We replay from before Ian’s relationship choices if we want to compare his later care and continued contact.
Replay from: before Ian’s early conversation, not only the final phone call
Route complete. Keep this save separate from our working slots.

Ending 4: Moving Forward
We still recover in hospital, but Ian’s aftermath changes: he is receiving psychiatric care, and we keep in touch by telephone. Adrian remains missing. It is a more hopeful direction for Ian and our recovery, not a promise that every danger has disappeared.
- Use the same rescue preparation
We follow the same main-trunk investigation above, through Oliver’s acknowledgement. We do not need a different telephone solution from The Empty Cage.
- Build the supportive relationship early
We answer Ian kindly and maintain that direction through the earlier exchanges. One late interaction is not a replacement for the history of the run.
- Read the distinct epilogue
Continue through the hospital scenes and Ian’s care-and-contact account to the Ending 04 card. Those details distinguish this route from Ending 3.
For comparison, we load the early Ian checkpoint and change our replies while keeping the investigation steps steady. We keep both finished saves so that the difference is visible without reconstructing a row of nearly identical late slots.
Replay from: before Ian’s early conversation, keeping the rescue preparation
Route complete. Keep this save separate from our working slots.
Our three useful replay saves
- Early choices
Before the first-night pill and Ian’s relationship conversations. This is the save we need when an earlier relationship state blocks the route.
- Before the scalpel and timed tasks
We separate action comparisons from input retries. A mechanical failure should not cost the whole run.
- Before the room and phone
We compare leaving with completing the rescue while holding the earlier choices steady. This slot cannot repair a clue we never read.
After an ending, we preserve its completed slot and work from a copy of the relevant checkpoint. We change one route ingredient at a time: the action, the investigation or the relationship direction. That makes a different outcome easier to understand.